How to Find Your Style

Finding your style can be such a challenge (take it from the girl that didn’t have one for 25 years!) I wore baggy t-shirts and jeans every single day, no make up, and my hair wet and in a ponytail.

At 25, after losing 50 pounds (funny, how that little thing called self worth makes an appearance after realizing you’re worth it)…so here I was, new body, new confidence, and no idea where to start. Shopping in the correct section was a challenge, let alone deciding what I liked.

Below, are a few tips that I’ve picked up over the last decade (Lord, help me, I’m old!):

  1. Learn what works for you, and flaunt it! I have curves, so I know that I can’t wear boxy or baggy things – I look like a house. If you’re short, shop in the petites section (Ann Taylor Loft has a great selection, as does Banana Republic).
  2. Start small. If you’re investing in an entirely new wardrobe, I’d suggest investing in the basics (a great pair of dark denim jeans, a crisp white button down, etc.) These pieces can take you through multiple seasons (if you’re lucky like me, and live in a part of the country that gives you four of them!)
  3. Build a budget. When I was just starting out of college, I was b-r-o-k-e. Every pay day, I would put money aside and buy myself one new article of clothing so that I could start building up my wardrobe. I don’t need to do it every week now, but I still put money aside, for a rainy day, or that random shopping trip with my bestie.
  4. Pinterest. If you haven’t heard of Pinterest, you’ve been missing out. Pinterest is an online community that allows you to create boards by subject (ie. My Style) and pin images from the web to those boards. You can automatically share your pins, create secret boards, and send pins to friends. I pin EVERYTHING. (If we aren’t connected, add me!) Pinterest is great for collecting ideas of what you like, but ALSO (I’m about to share a little secret with you) – you can use it to brainstorm different outfits. I use this ALL.THE.TIME. Anytime I’m in a style rut, I’ll search for things like “mustard skirt” because I already own a mustard yellow pencil skirt for work. It’s AWESOME. This is a great intro into my next point…
  5. Reduce, Reuse, Recycle. My friends tease me about this, but I hold true – I will only buy something I can wear three ways, and it has to be something already in my closet. So, for example, the mustard yellow skirt I can wear with leopard ballet flats and a white shirt; a gray shirt and nude flats; or a navy sweater and nude heels.
  6. The Devil is in the Details. I am a fiend for accessories. A killer statement necklace, chunky bracelet, or heaven forbid it’s fall out – you will catch me daily in a blanket scarf. Accessories make or break an outfit. I have taken a plain white t-shirt and jeans and dressed it up with a statement necklace and heels for a cute brunch outfit with friends. Casual doesn’t have to mean sloppy!
  7. Test Drive the Trends. I’ll admit, I’m not one for trends. I much prefer a classic look that will last the test of time. However, I’ve been known to jump on the band wagon (studded clutches anyone?). Nervous about taking the plunge? I tend to buy one or two things with said trend, so that I don’t have to overhaul my entire wardrobe when the trend inevitably goes out of style (sorry, neon leggings!).

I hope you find these tips helpful! What are your favorite style tips?

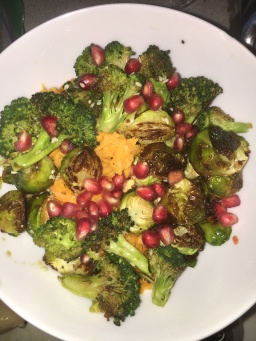
Let’s Eat! Sweet Potato, Brussel Sprouts, Pomegranate Bowl

img_3644

Tonight, I made a healthy, fresh dinner in 36 minutes. No, not a typo. Here’s the thing, I love to cook, but I hate spending all day in the kitchen. Ain’t nobody got time for that! I found this recipe on Inspiralized, so I had to share it. I made this last night and liked it so much, I made it again tonight!

Ingredients:

  • 1 medium sweet potato, peeled
  • 2 cups of brussel sprouts, peeled and halved (to save time, buy them pre-peeled and sliced)
  • 1 cup of broccoli, chopped
  • 1/2 cup of pomegranate kernels
  • 1 tablespoon avocado oil
  • 2 boneless, skinless chicken breasts, cooked (I used chicken I already had cooked)

Sauce:

  • 2 tablespoons champagne vinegar
  • 1 tablespoon avocado oil
  • 1 tablespoon soy sauce
  • 1 tablespoon rice vinegar
  • 1/4 teaspoon garlic powder
  • 1 tablespoon maple syrup
  • 1 teaspoon sesame seeds

Instructions:

  1. Preheat your oven to 350 degrees.
  2. Pat chicken dry. Brush with avocado oil and season with salt and pepper.
  3. Put chicken in a 9×13 casserole dish and roast in the oven 30-45 minutes, or until cooked through.
  4. Peel and halve your brussel sprouts and chop up your broccoli. Toss with avocado oil, salt, and pepper. Lay evenly on a baking sheet. Roast in the oven with the chicken (I would put it on the bottom rack) for about 20 minutes.
  5. Spiralize sweet potato (if you have one). If you don’t, grating with a cheese grater works too.
  6. Add 1 tablespoon of avocado oil to a non-stick skillet on medium heat. Add sweet potato and cook through, about 5-7 minutes.
  7. Once cooked through, separate into two bowls.
  8. Add the roasted brussel sprouts and broccoli to the bowls, once they are cooked to your liking. Add 2 oz of the roasted chicken.
  9. Slice your pomegranate open and remove the kernels. Put 1/4 cup of kernels on each dish.
  10. Mix all of the wet ingredients together to form the sauce. (I only needed 1 tablespoon per bowl, but you may like more)

Hope you enjoy as much as I did!

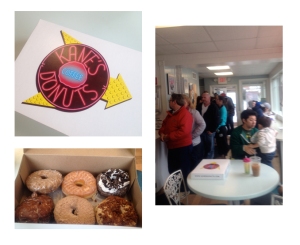
Kane’s Donuts: YUM

Kane's Donuts

Kane’s Donuts!

DONUTS. Is there anything better to talk about? Ok, well maybe there is (and I’m not even a donut person) but these donuts are on point. If you’re a local, than you’ve probably already heard, the famous Kane’s Donuts in Saugus has opened a second location in the city. My friend, Chissel, and I decided we had to check out the original location because, well, she loves donuts, and I love a good adventure and neither of us felt like going into the city.

Like I said, Kane’s Donuts is located in Saugus, MA, a suburb right outside Boston. I haven’t been up there since the night I flew in, and it is SO cute in the daylight. Lots of cute little cottages. Chissel and I “house shopped” while we were driving back, and by “house shopped”, I mean we got lost, and took the scenic route home. Anyways, back to the donuts.

These donuts. Guys. They were amazing. I’m not even a donut person. I got a half dozen ($9.95) just to try the different flavors: Maine Blueberry (my favorite), Honey Dipped (similar to glazed), Cookies & Cream (I know.Just.I know), Maple Bacon (for a colleague), Apple Cinnamon (amazing), and Cinnamon Sugar. Blueberry was definitely my favorite but I suspect it’s because I want all things blueberry right now. The donuts managed to last a full week in my house without getting gobbled up, I was pretty impressed with my will-power. I’m still dreaming of that Maine Blueberry donut to this day!

If you haven’t checked it out, you need to make the trip. It’s totally worth it. Kane’s opens at 3 AM – we got there by 11 and the line was out the door still! The staff was friendly and helpful (a rarity here, let me tell you), and the inside is SO cute – wrought iron tables and chairs, and you can definitely picture it 20-30-40 years ago. I fell in love with the decor and old-timey charm.

I hope you all enjoy it as much as we did!

Let’s Eat!: Baked Onion Rings

OK, guys. I just got back from a weekend in my hometown that holds an annual fall festival, The Big E. You know how it goes: rides, beer, fair food (corn dog, anyone?). Needless to say, I did not eat healthy this weekend. I also got stuck on the Pike for over 2 hours (thank you, Massachusetts traffic!). I could have gone to my local pizzeria and grabbed a slice, but instead, I sucked it up and roasted some broccoli, heated up a Trader Joe’s veggie burger and some roasted asparagus. Then, I saw the vidalia onion in my fridge and remembered that I was still trying to make the perfect baked onion rings. I made a batch a few weeks ago that were AWFUL. They were dry AND burnt. Ugh. I decided to take another stab at it, and I think I’ve FINALLY done it.

Ingredients:

  • 1-2 vidalia onions
    1/4 cup whole wheat flour
    1/4 cup skim milk
    1 tablespoon vinegar
    1/2 cup panko breadcrumbs
    kosher salt

First, preheat your oven to 400 degrees (I had mine on 375 because I have a gas oven and it heats up pretty quick). Then, cover a cookie sheet with parchment paper. I also lightly sprayed it with Pam.

Slice the onion about 1/4″ thick. Separate the rings.

Add the sliced onion and flour to a large ziplock bag. Shake until lightly coated.

Then, add the skim milk and vinegar to a shallow bowl. In another shallow bowl, put the panko breadcrumbs. Dip the onion rings in the milk/vinegar (a buttermilk DIY) and then into the panko. Spread the rings evenly on the cookie sheet. Salt with kosher salt.

Roast for 20 minutes in the oven.

Serve immediately.

I hope you enjoy!

Let’s Eat: Tomato Soup & Mozzarella Balls (Yes, You Read That Right)

Boston’s weather has been a bit erratic lately. Last week, it was in the 80s and muggy. This weekend, the temperature plummeted. It was 50 degrees this morning and windy. So cold, I had to cover my ears at the flea market to keep them warm. A little too cold for early September if you ask me. Regardless, the cooler weather is what prompted my most recent “Sunday Food Prep” adventure in the kitchen.

I was craving tomato soup so dug through my recipes to find one of my favorites from Peas & Crayons. Lately, I have been focusing on eating healthy and also being resourceful. I hate wasting food, and it just so happened I already had most of these ingredients in my fridge & pantry. Also, I’m lucky that my sweet landlord dropped off some fresh tomatoes the other day, and I had a can of cherry tomatoes in the pantry, so used up what I had.

Quick note: you’ll need a food processor, immersion blender, or blender for this recipe.

Before you start on the soup, I would prep the mozzarella balls. I used a ball of fresh mozzarella that I got at Russo’s in Watertown (shameless plug for Russo’s: if you haven’t been, you NEED to check this place out. It’s a family owned grocer that has the freshest and most affordable produce, along with wonderful cuts of meats, and fresh bread. I love perusing the aisles on a Saturday.) OK, back to the mozzarella balls–so, first slice and dice your mozzarella into cubes (mine were about a half inch thick). Then, put them on a plate or a tray lined with parchment paper. Make sure the cubes aren’t touching each other. (This is actually really important, otherwise they will be frozen together and you’ll have to chisel them apart.) Put the tray in the fridge for at least an hour. (I let them freeze while I was doing the rest of the soup prep, so probably an 1-2 hours.) The longer you can put them in the freezer, the better, though I’ve only done it for a max of 4 hours before.

To start on the soup you’ll need:

Ingredients:

  • 1 onion
  • 2 celery stalks
  • 10 baby carrots
  • 1-2 tablespoons Extra Virgin Olive Oil
  • 1 14.5 oz can of cherry tomatoes (you can use diced tomatoes too)
  • 1 28 oz can of crushed tomatoes (this is all I could find at the store, and instead of wasting half the can, I threw it all in there)
  • 3 fresh tomatoes
  • 1 cup of low/no sodium chicken broth (I had some leftover in the fridge from a meal last week, so wanted to use that up) (you could also use vegetable broth)
  • 1 clove of garlic (I’m the lame person that uses the refrigerated, already prepped in a jar kind. Don’t judge.)
  • 3-4 oz. of fat free cream cheese (or 1/4 c-1/2 c skim milk)
  • Salt and pepper to taste

First, dice the celery, onions, and carrots. Add the olive oil to a soup pot over low-medium heat. Next add in the carrots, onion, and celery. Sautee until the onions are translucent (about 5-10 minutes). Add in the garlic. Sautee for another minute.

While that is cooking, dice up your fresh tomatoes. Add the tomatoes and chicken stock, along with both the crushed/pureed tomatoes, canned cherry tomatoes, and cream cheese. Turn the pan on medium, and let it simmer for 25 minutes.

While that is going, prep your mozzarella balls for the oven:

Ingredients:

  • 1 package of fresh mozzarella
  • 1/4 cup of whole wheat flour
  • 1 egg white, whisked
  • 1/4 cup of panko seasoning

Prep: Pre-heat oven to 400 (I have a gas oven, which seems to be about 25 degrees warmer, so I had mine on 375). Line jelly roll pan with aluminum foil. Place cooling rack on top of aluminum foil.

Remove mozzarella from freezer. Get three shallow bowls (one for the flour, one for the egg white, one for the panko). Roll the mozzarella balls in the flour, then egg white, then panko. Lay mozzarella on top of cooling rack. Bake in oven for 8-10 minutes or until cheese is a light golden brown. Keep an eye on them. Mine was done at about 8 minutes (if you over cook them, they’ll just melt into one giant, delicious blob of cheese).

Once the soup is finished simmering, use your food processor (or imersion blender if you’re lucky enough to have one) and blend the soup together so it’s nice and smooth. Serve with 3-4 mozzarella balls. Enjoy!

Let’s Eat: Heart Healthy Oatmeal Cookies

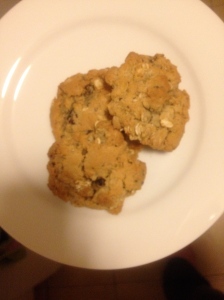
IMG_2845As I’ve said in the past, I try to eat fairly healthy. Every once in a while, I need a treat (don’t we all)? I came across this Heart Healthy Oatmeal Cookies earlier this week. The weather here was drizzly and gross tonight, perfect baking weather.

I mimicked this recipe, the only thing I did was swap out half of the white flour with whole wheat flour. These are amazing. They’re soft and chewy, and I don’t feel horrible about eating them. Next time, I think I may add fresh cranberries for a little tartness. (We’re celebrating cranberry season up here in Boston, and I intend to take full advantage this year!)

Ingredients:

  • 1/2 cup whole-wheat flour
  • 3/4 cup all-purpose flour
  • 1 cup regular oats
  • 3/4 teaspoon baking powder
  • 1/2 teaspoon baking soda
  • 1/2 teaspoon salt
  • 3/4 cup granulated sugar
  • 1/2 cup packed brown sugar
  • 1/3 cup butter, softened
  • 1 1/2 teaspoons vanilla extract
  • 1 large egg
  • 1/4 cup chopped pecans, toasted
  • 1/4 cup semisweet chocolate minichips

PREPARATION:

  1. Preheat oven to 350°.
  2. Lightly spoon flour into dry measuring cups; level with a knife. Combine flour and next 4 ingredients (through salt), stirring with a whisk; set aside.
  3. Place sugars and butter in a large bowl; beat with a mixer at medium speed until well blended. Add vanilla and egg; beat until blended. Gradually add flour mixture, beating at low speed just until combined. Stir in pecans and minichips.
  4. Drop dough by tablespoonfuls 2 inches apart onto baking sheets lined with parchment paper. Bake at 350° for 12 minutes or until edges of cookies are lightly browned. Cool on pans 2 minutes. Remove cookies from pans; cool on wire racks.


Get Crafty: Studded T-Shirt

studs 0901114I’m obsessed with anything that has details: studs, chains, pearls, you name it. I love anything that gives my outfit a little attitude.

I’ve been on the hunt for a studded shirt for months and couldn’t find anything I really liked. Last weekend, I was perusing through the Old Navy clearance rack and I found this t-shirt for $7. *Score* I ran over to Michael’s and found a variety of studs, from silver to gold, to the kind with the teeth that you poke through the fabric, to these “iron on” studs. (Tip: They were in the aisle with the t-shirts and puff paints.)

These particular ones came in a 5″ x 5″ sheet. Each stud is connected by a little string. Originally, I thought these were iron on (as the label instructed). Imagine my dismay when I opened the package, only to find out that you need fabric glue (what IS that?!) or you need to sew these on by hand. UGHHHHH. I had my mind set that I was going to finish this project tonight. I just HAD to.

So, I took a deep breath and decided to tackle it. The only glue I had in my apartment was Krazy Glue. Krazy Glue works on pretty much everything BUT fabric. Great. I had no choice but to turn to my trusty sidekick, my sewing box. I hand sewed each stud, and cut off the excess sheet, mimicking the pattern from one side to the other.

Quick tip: Before I started sewing, I measured my “design” to see how far down I wanted to go, and traced a faint line with my “sewing pencil” (It’s made for fabric, and smudges out when you rub the fabric together.)

This project took about two hours to do. It was a little frustrating because the studs kept moving as I sewed. I did try to pin it down, but that didn’t really work either. Next, I want to try a pair of ballet flats — and try “fabric glue”. (I still think it’s not a real thing.)

Let’s Eat!: Fresh Mozzarella Stuffed Bruschetta

Hey y’all! I hosted a girls night at my house this week and made a health-ier Mozzarella Stuffed Bruschetta. Back in Jax, my favorite restaurant, Biscotti’s serves bruschetta stuffed with mozzarella. It’s one of my favorite things on the menu. Maybe I was feeling a little homesick, who knows. Regardless, I made the yummiest bruschetta and wanted to share the recipe with you! You’re welcome!

First, I found a healthy version of bruschetta on my favorite website, Skinnytaste. If you haven’t heard of Gina’s site, you are truly missing out. Her recipes are amazing and I’ve never had a bad thing. Everything is healthy and fresh. Gotta love it!

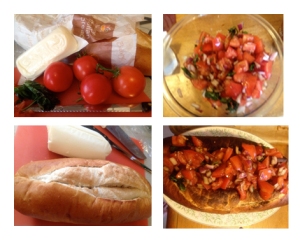
tomatobasilbruschetta 090514

Mozzarella Stuffed Bruschetta:

I used Gina’s Bruschetta with Tomato & Basil recipe and added a twist.

Ingredients:

        – 6 or 7 ripe plum tomatoes, diced
        – 2 cloves garlic, minced
        – 1/4 small red onion, chopped
        – 1 tbsp extra virgin olive oil
        – olive oil spray
        – 2 tbsp balsamic vinegar
        – 6-8 fresh basil leaves, chopped
        – kosher salt
        – freshly ground black pepper to taste
        – 16 oz baguette or French bread
        – 1-2 garlic cloves, peeled
               – 1 roll of fresh mozzarella (I used Trader Joe’s)

Directions:

Combine tomatoes, chopped garlic, red onion, vinegar, oil, salt, pepper, and basil. Set aside.

Slice bread the long way (I tried this recipe twice. The first time, I just sliced it and stuffed with mozzarella. The second time, I cut it more of an angle and tried to scoop out some of the breading.) Slice the mozzarella in 1/4 inch slices and stuff the bread with it. Broil for 8-10 minutes (make sure to keep an eye on it, I burned the first loaf I made–as evidenced in the pictures above :-\).

Then, cover the bread/mozzarella in the tomato/basil mixture.

Slice and serve.

Healthy Chocolate Chip Cookies

Hi guys,

I spent six hours cooking today so I would have enough healthy food for the week. I made Minestrone Soup, my own fresh tomato sauce (I winged it, and it was AMAZING), roasted veggies, Quinoa Breakfast Bars with Blueberries, and Healthy Chocolate Chip Cookies.

I winged these cookies, and I was impressed with how they turned out. They need to cook a little longer than traditional Tollhouse Cookies.

1 1/8 cup white flour
1 1/8 cup whole wheat flour
1 tsp baking soda
1 tsp salt
1/2 cup butter (or Crisco)
1/2 cup applesauce
1/4 1/8 cup sugar
1/4 1/8 cup brown sugar
1 tsp vanilla extract
1 large egg, 2 egg whites
2 cups Carob chips

1) First, I mixed the Crisco, applesauce, sugar, brown sugar, and vanilla.

2) Then, I added the eggs, salt, white flour, whole wheat flour, and baking soda.

3) Last, I added the Carob chips.

I baked them at 325 for 13 minutes.

Once they came out of the oven, I sprinkled them with Kosher salt.

I’m happy with them, though I think next time I may try oat flour instead of whole wheat flour.

Let’s chat! How do you lighten up your cookies? Have you ever cooked with Carob chips?